Showing posts with label snack. Show all posts

Saturday, 19 March 2016

Rice Krispie Easter Treats

We have a very special announcement to make! It is our one-year blogaversary!!! It's hard to believe how quickly this past year has flown by. We have learned so much and we are so thankful to have so many amazing readers supporting us this past year. Thank you all. We do this blog purely to share our passion with others and it means the world to us to have you follow along in our creative journey. Okay, sorry to get all mushy on you guys, we are just so appreciative to have made it this far. Now onto the topic of this blog post...bunny butts and egg filled nests!
Not going to lie, the plan was just to make some cute *simple* rice krispie bunny butts. Before I knew it I was molding a nest with my bare hands, coating it in chocolate and toasted coconut and sticking it onto a decorated ice-cream cone filled with candy. Why does this ALWAYS happen to me?!
Another confession, I ate allllllll the mini eggs before they even made it into the nest or cone. I am so weak when it comes to mini eggs. What exactly makes them soooooo tasty?! That combination of crunchy candy and melty milk chocolate is deadly. The Cadbury mini egg is officially my achilles heel...or kryptonite. I tried to get away with using mini marshmallows in place of the mini eggs but the type-A perfectionist in me just wouldn't let me get away with that. I ended up packing up both kids in the double stroller and running to the corner store with them to purchase more mini eggs.
These treats look intimidating but they are actually really easy and don't take too long to make. I managed with 2 kids literally hanging off the kitchen counter- gawking and whining the entire time. 

Ingredients
  • Rice Krispie cereal
  • Mini marshmallows (save some for the bunny tail)
  • Butter
  • Vanilla extract
  • White chocolate candy melts (you can buy all kinds of coloured melts at Bulk Barn or Michaels)
  • Green candy melts
  • Toasted shredded coconut (from Bulk Barn) -if you are not a coconut fan, try peanut/other nut crumbs, coloured sugar, sprinkles, cocoa powder even! 
  • Green sugar
  • Coloured sprinkles
  • Plain flat bottom ice-cream cones
  • Lollipop sticks (again from Bulk Barn)
  • Chocolate coated fingers (I found mini "pointers" at dollarama!)
  • Mini eggs
Method

Rice Krispie Base (for both bunny butts and nests)
  1. Follow directions to make the original Rice Krispie treats.
  2. Transfer to a glass bowl and let cool for at least 5 minutes or until you can handle the mixture without it sticking to your hands. It also helps to grease your hands with butter or coconut oil to prevent it from sticking. Using greased hands, mold rice krispie mixture into round balls (approximately 1.5 to 2 inches in diameter). These balls will be the base for both the bunny butts and nests.

Bunny Butts
You can make these on a stick or on a cone or just on their own (ha! That rhymed!).

Bunny Butts on a Stick
  1. Melt white chocolate candy melts (I find candy melts are the easiest to use) according to instructions on package.
  2. Dip end of lollipop stick into melted white chocolate. Push stick into rice krispie ball. Chill for at least 10 min in the fridge to allow sticks to set in place.
  3. Dip chilled balls into melted white chocolate. Allow excess chocolate to drip off. Coat chocolate covered balls in toasted coconut.
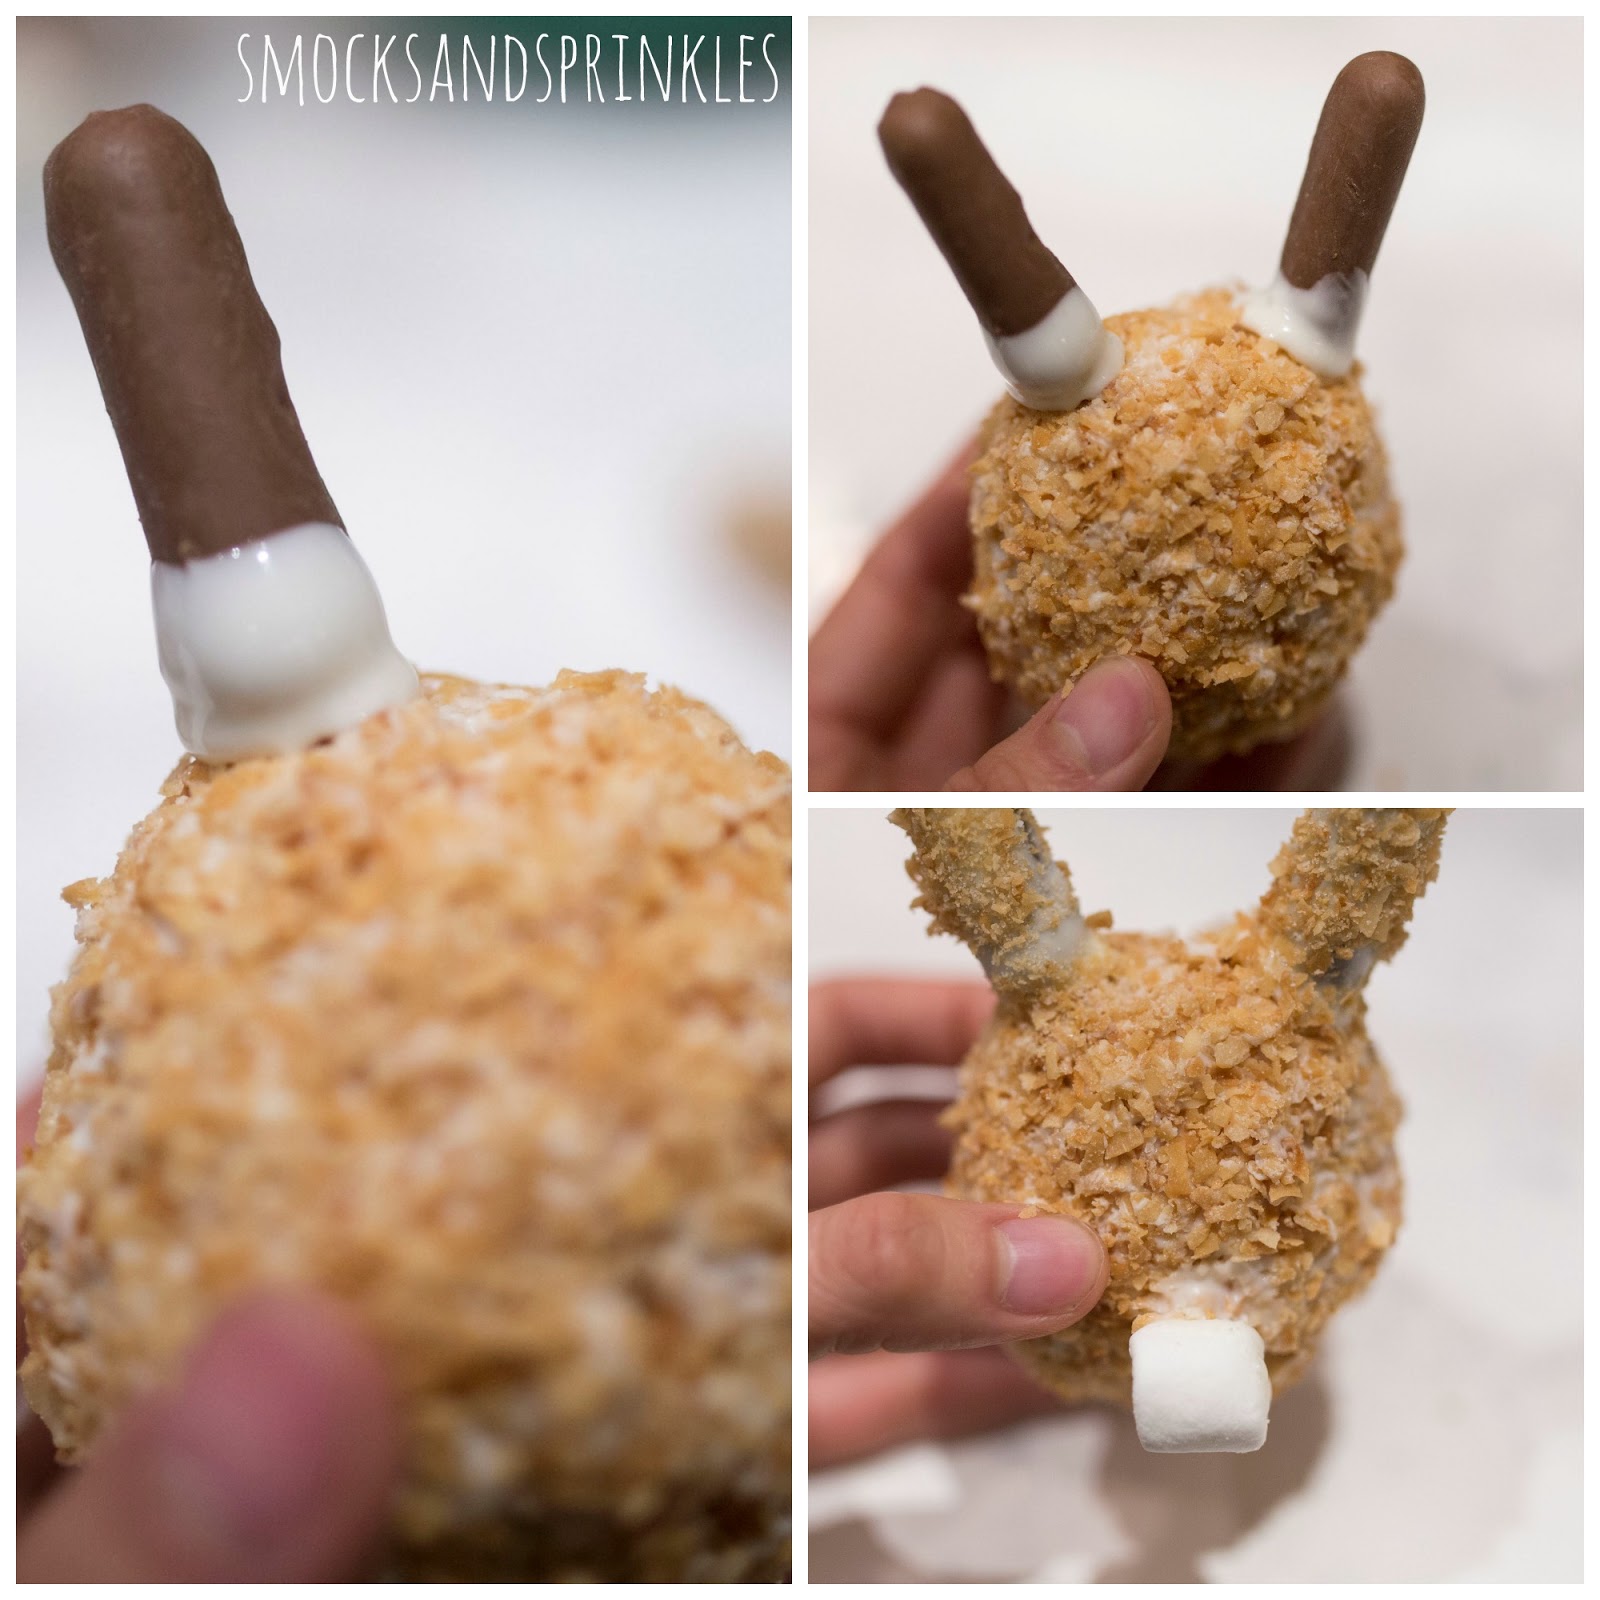
  4. Attach "bunny ears" and "tail" using melted white chocolate as the "glue". Let it set.
  5. Coat bunny ears in melted white chocolate and then cover in toasted coconut. Note that I did this step last because it was a last minute decision to coat the bunny ears in chocolate and coconut. I originally planned to leave them plain but decided it was much cuter coated.
Bunny Butts on a Cone
  1. You basically follow the same above instructions above to make the bunny butts, just omit the stick part. You can use a spoon to coat the balls in the melted chocolate and toasted coconut.
  2. Dip the edge of the ice-cream cone in melted green candy melts (I chose green because it looks like the bunny is in "grass") and then into green sugar sprinkles. 
  3. Fill cone with candy of your choice. Pick your child's favourite treat to surprise them! Add some melted green candy melt around the top edge of the cone and "glue" on the rice krispie bunny.
Nests on a Cone (these also look awesome on their own)
  1. Using your thumbs, shape rice krispie ball into a nest. It's best to work with the rice krispie balls while they are still slightly warm.
  2. Coat nest in melted white chocolate melts. Drain off excess chocolate. Toss nest in toasted coconut.
  3. Use melted white chocolate to "glue" on mini eggs.
  4. Dip the edge of the ice-cream cone in candy melt in the colour of your choice (I just used white) and then coat with some fun coloured sprinkles.
  5. Fill cone with candy of your choice. Again, pick your child's favourite treat to surprise them! Add candy melt around the top edge of the cone and "glue" on the rice krispie nest.
You can easily wrap up these adorable treats in plastic bags or cellophane. Be sure to add a cute ribbon. Perfect to give away to guests at your Easter brunch, lunch or dinner!

Enjoy making these tasty Easter treats and remember to share your creations with us on instagram (@smocksandsprinkles)!


Wednesday, 12 August 2015

Yogurt drops for teething

It's that time again.  That time when the grumpy teething monster rears its ugly head!  Our little ones have teeth coming in, and it is making them cranky!  We're always on the lookout for things to ease their pain, and these yogurt drops are fast, easy, and perfect for the job.  Now, if only Sophie the Giraffe came in yogurt form!

Ingredients:
  • 1/2 cup yogurt (greek or strained works better for getting "plumper" drops, but we used plain organic and it worked but the drops were thinner)
  • fruit or veggie addition of your choice (we made 2 batches: one with 1/2 avocado and one with 1/2 banana) 
  • parchment paper, cookie sheet
Tip!  Consider making these drops with your favourite smoothie or other baby food.  You can really do it with any liquid!


Method:
  1. Mash ingredients together with a fork, or blend together for a smooth consistency.
  2. Drop spoonfuls of the mixture onto a parchment lined cookie sheet.  The smaller you make them, the faster they melt, so keep that in mind! If you're type A like us you can use a squeeze bottle or ziplock bag with the edge cut off to form perfect little circles.
  3. Place cookie sheet in freezer until drops set.
  4. Remove drops and enjoy!  Store these in the freezer until a teething emergency beckons.
We had to try these out, too, and they're delicious! Our little ones devoured these, although the cold texture shocked them at first!
Get in my belly!
Let us know how your little one enjoys them!  Also let us know what your best teething tips are!  We need the help....Help!
pin me!

Monday, 13 July 2015

Easy Meal & Snack Trays for Kids

There is this awesome restaurant in our neighbourhood called The Beet that offers "nibbler platters" on their kiddie menu. My toddler is always asking for a nibbler platter. It's the small bite-sized portions and variety that she finds appealing. I decided to make my own version of the nibbler platter using ice cube trays (I'm sure you've come across them in pinterest).
I realized that my daughter would surely eat all the good stuff (fruit, crackers etc.) first if I handed her a tray mixed with random food items. It made more sense to create actual meal/snack trays. It looks really time consuming but it actually takes very little time and effort! I just used items I had in my fridge/pantry. You can always fill 2 or more cubes with the same food item if you don't have 12 different items to fill your tray. You can easily make these trays ahead of time. The ice cube trays I use are actually meant to freeze baby food (fresh baby so easy food/breast milk storage trays) and they come with lids!
The ultimate bento box to go!
Perfect for packing up for a picnic or road trip! Just be sure to layer cling wrap in between the tray and lid to keep all the contents in place. The best part of these trays is that your kid is getting a wide variety of healthy food choices.

The deconstructed salad tray basically has all the components to make one amazing, healthy salad. I made sure to fill 1/3 of the tray with foods high in protein. You can mix and match steamed, raw and roasted veggies. I also like to include some heartier starchy veggies, like sweet potato or corn to keep my toddler satiated.
Here are some ideas of what you can put in your salad tray:
  • chickpeas
  • edamame
  • peas
  • snap peas
  • green beans
  • asparagus
  • brocolli
  • cauliflower
  • tomatoes
  • sweet potato
  • corn
  • beets
  • carrots
  • cucumber
  • pepper
  • mushrooms
  • boiled egg
  • cheese
  • nuts
  • seeds
  • tofu
  • meat
  • avocado
  • lentil pasta
Tip! If your kid is a dipper, fill one or two cubes with a healthy spread like hummus or tzatziki.

The breakfast tray has all the components for a well rounded breakfast. Again, try to include some healthy protein and carb choices. The breakfast tray also makes a really healthy snack tray.
Here are some ideas of what you can put in your breakfast tray:
  • french toast/pancakes (I make my own using whole grain bread/flour)
  • muffin (I cut up pieces of our healthy pineapple breakfast muffin recipe)
  • whole grain pita
  • cereal (low in sugar preferably)
  • boiled egg
  • meat
  • cheese
  • nuts
  • seeds
  • dried fruit (prunes, dates, apricots etc.)
  • blueberries
  • blackberries
  • strawberries
  • cherries
  • grapes
  • apple
  • pear
  • melon
  • citrus fruit
  • banana
Someone is enjoying their nibbler tray!

I also thought of a trail mix tray. Haven't made it yet but planning on it. Here are some ideas of what you can put in a trail mix tray:
  • different types of cereal (again, be sure to check the sugar content!)
  • whole grain pretzels
  • crackers
  • nuts
  • seeds
  • raisins
  • other dried fruit 

So grab your ice cube tray and start assembling! Let us know if you come up with a different tray theme! Deconstructed pizza or hamburger tray perhaps?

Pin me!


Related Posts Plugin for WordPress, Blogger...