Monday, 27 April 2015

Super Healthy Snack Bars

sweet potato, apricot, banana
Full of protein, fiber, iron and good fats, these healthy dense moist bars can be eaten as a snack or part of a meal any time of the day! I was on a mission to create a super healthy fruit/veggie packed baked treat that could be enjoyed by my 9 month old and 3 year old (and myself!). I didn't want any refined sugars, it had to be wheat free and it needed to be full of good calories. Both of my kids LOVED it!!! I cut it up into tiny little cubes for my 9 month old and they were easy for him to pick up and feed himself (easier for me!). He hates mushy baby food so this bar is perfect for him. It's actually kinda like baby food in a bar form...I'm so devious. I also trialed it on my 2 year old nephew who is a little pickier than my kids and he inhaled it! Success:)

Ingredients:
  • 1/2 cup apricot purée
  • 2 very ripe medium size bananas
  • 1 medium size roasted sweet potato
  • 2 eggs (I only use organic free range eggs...happy hens= happy me)
  • 1/3 cup pure coconut oil
  • 1 cup almond meal/flour
  • 1 cup oat flour (I ground up organic old fashioned oats in my magic bullet to make oat flour)
  • 1 tsp baking powder
  • 1/4 tsp salt
  • 1 tsp real vanilla extract
Method
  1. To make apricot purée: place approximately 15 dried organic (unsulphured) apricots inside a sauce pan. Add enough filtered water to cover the apricots. Bring to a boil. Turn down heat and allow to simmer until apricots look plump and soft enough to mash with a fork. They should have absorbed most of the water by this point. Measure out 1/2 cup of mashed apricot for the recipe.
  2. To make roasted sweet potato: scrub a medium size sweet potato and place onto aluminum foil on a baking pan. Bake at 375 F for at least an hour. This allows the sugars in the sweet potato to caramelize. You should see juices oozing out and it should be very soft when poked with a fork. Cool and remove skin before mashing. The skin should fall off easily.
  3. sweet potato oat almond flour
    sweet potato oat almond flour
  4. Combine apricot purée, mashed sweet potato and mashed banana in a large bowl. Blend until smooth.  
    sweet potato apricot banana bars
  5. Add in melted coconut oil, eggs and vanilla. Blend. 
    sweet potato banana apricot bars
    sweet potato banana apricot bars
  6. In a separate bowl, combine almond flour, oat flour, baking powder and salt.  
    almond and oat flour
  7. Add dry ingredients to wet ingredients and stir until just combined. 
    sweet potato banana apricot bars
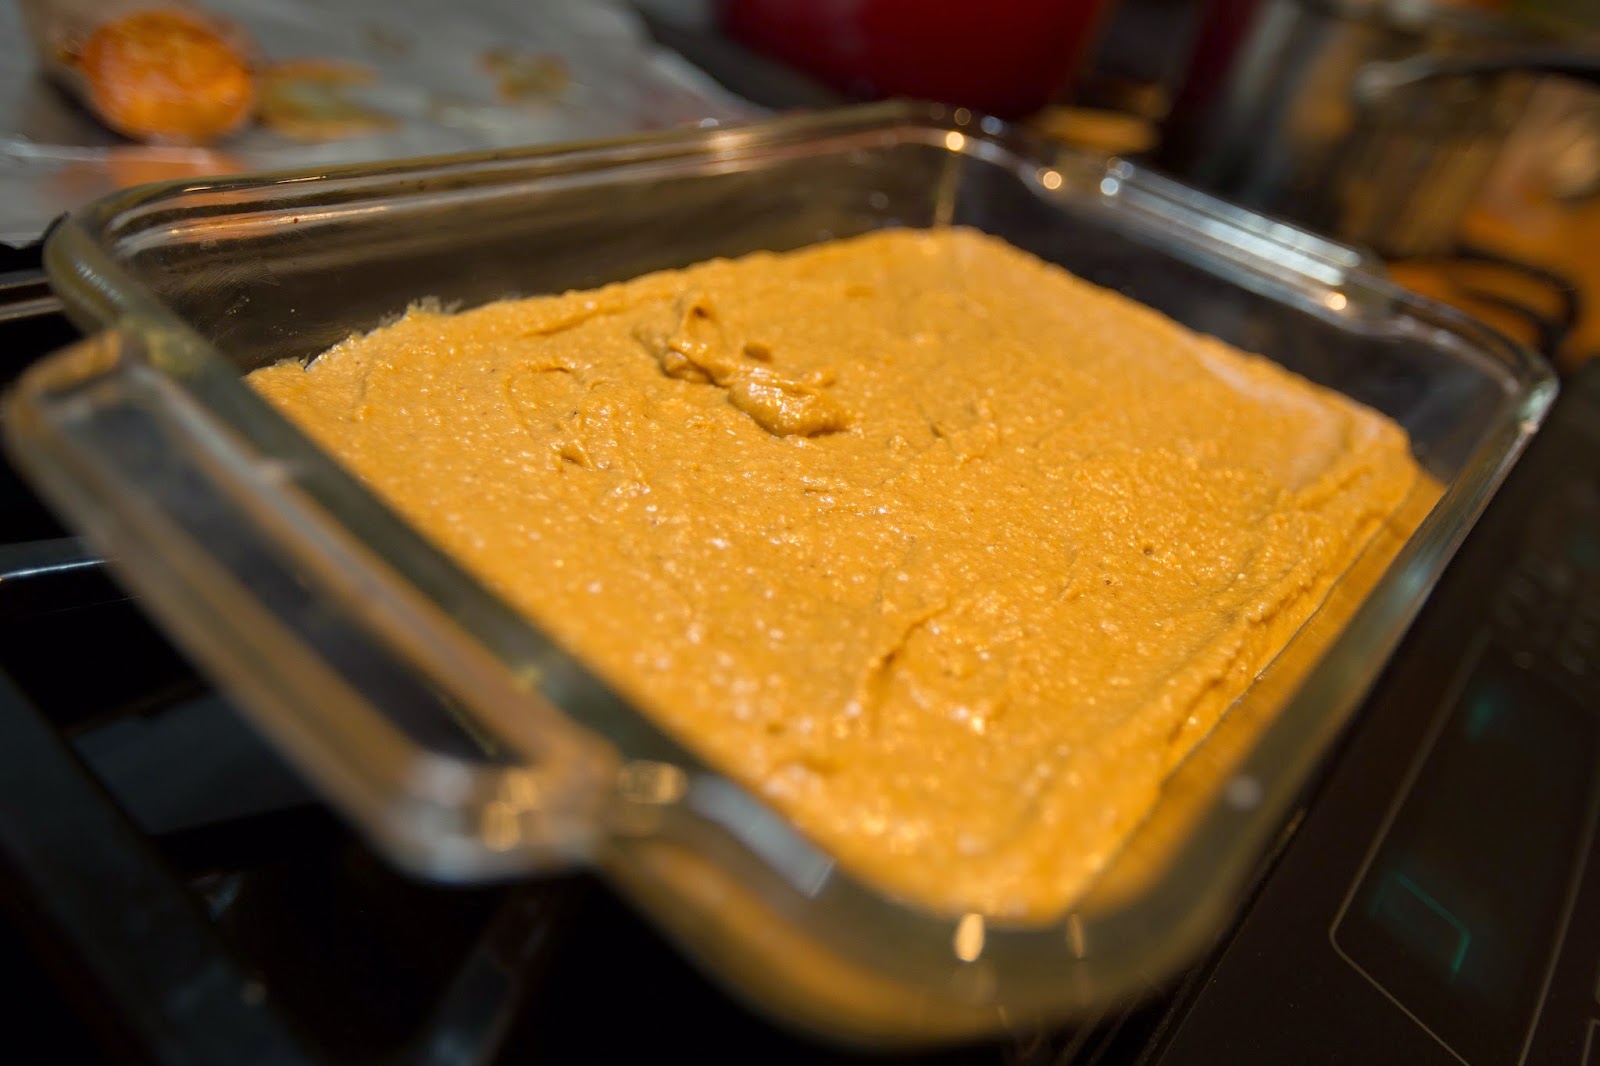
  8. Pour into an 8 x 11 inch greased baking pan or glass dish. I used coconut oil for greasing. Bake at 350° F for approximately 40 minutes. 
    sweet potato, apricot, banana bars
    sweet potato, banana, apricot bars
    Allow to cool until warm to the touch. Then cover tightly with aluminum foil and allow to cool completely (couple of hours). This seals in the moisture. Cut into bars and enjoy!!! Best stored in an airtight container in the refrigerator.  
Tip! To make this recipe gluten free, simply use gluten free oats. 

She loves it!  I win! 

Tip! Add in 1/4 cup of hemp seeds to up the nutritional value even more.

Let us know how your healthy snack bars turn out!

P.s. We will be working on a nut free vegan version and a chocolatey version...Mmmmm....stay tuned! 


Saturday, 25 April 2015

The Healthiest Pasta Ever?


My latest food obsession...red lentil pasta by Tolerant. My hubby spotted this hidden treasure while perusing the aisles of Costco. 


Okay, the only ingredient is organic red lentils. You heard me....ONE ingredient. It's chock full of protein, fiber and iron!!! Mind blowing really! I was all giddy while we waited for it to boil.


Made a quick tomato sauce with onions and mushrooms and added a big dollop of goat cheese to make it creamy and rich. The verdict? AMAZING! Everyone ate it including my 9 month old and 3 year old. I can't wait to come up with new recipes to use this pasta in.


Note: I am in no way connected to Tolerant pasta....I am just a huge huge fan...maybe even their BIGGEST fan.  
Give it a try and let us know what you think!

Sunday, 19 April 2015

Raising emotionally intelligent children

The terrible twos.  What makes them so terrible, exactly?  One of the things I noticed, literally the week my daughter turned two, was that she started throwing tantrums.  I think one of the main reasons she's started doing this is that she's starting to feel all these emotions and doesn't know what to do with them.  She feels upset or angry, but doesn't know how to express it.  Knowing how to identify and express emotions and feelings is a huge part of emotional intelligence. 

How are you feeling, little one?

I recently read this article that highlights the importance of emotional intelligence as adults, but I think it's so important for us to be raising emotionally intelligent children, too.  In conflict resolution, one of the main things we teach is to express your feelings by using "I" statements.  You know, "I feel _____ when you do _____."  Expressing our feelings is key in developing stronger relationships and getting to know others.  That's why teaching your children emotional vocabulary is so important!  Learning to recognize how others are feeling is also really important in learning to be compassionate and empathetic.  I've been trying to teach this to my 2.5 year old (and my husband, too, haha), and I thought I'd share how we are trying to do it.

When she was younger, I would identify how she appeared to be feeling when she was emoting.  For example, when she was crying, I'd say, "You're crying.  It looks like you feel sad."  If she was throwing a tantrum, I'd wait until she was calmer, and then say, "You were crying and yelling.  Were you angry?"

 
We started with these emotions:
  • happy
  • sad
  • mad/angry
  • scared
  • excited
  • lonely
  • embarrassed
Then we started reinforcing some of these during our bedtime routine.  I came across this post in my Pinterest travels, so I've started asking my daughter the first two questions:


I want her to be able to express what made her happy so that we can pray and be thankful for these things.  And lately she's taken to telling me she's happy because I'm playing with her.  Melt.   She has also taken to telling me she's lonely in an effort to get me to co-sleep with her.  Can't blame a girl for trying!  As she learns to express these feelings, I think we'll venture into asking her about her other emotions.


We've also had great success discussing feelings through books.  I like to ask my daughter how she thinks people are feeling by looking at their expressions.  There are lots of great children's books about feelings.  These are some of our favourites:

If you're looking for a longer list, there's a great feelings book list for infants and toddlers. 

Tip! If you have photos of your child showing different emotions, why not print your own photobook using Shutterfly, or another photobook publisher?

How do you help your child express his or her emotions and feelings?  What resources do you use?

Wednesday, 15 April 2015

Designing the Perfect Nursery

nursery travel theme

The perfect nursery - A haven for sleepless nights, endless cuddles, story-time and making memories. I thought long and hard about how to create what I thought was the perfect nursery. When child 2 came along, I used the template from the first nursery to create a second one. Saved me a lot of time (which we all know is sacred once children come along). So here it is...the essentials for the perfect functional nursery.
  • Colour and theme. You will need to decide on a colour palette and overall theme.  This is the perfect place to start your planning.


  • Crib and mattress- you don't need to spend an arm and a leg on a crib. We purchased a simple inexpensive crib from ikea and it is just perfect.  We didn't bother with fancy bedding...a simple crib sheet is all you need to keep the room looking modern and clean.
  • Change table- a long dresser is definitely preferable since it can be used long past the baby stage. Just secure a change pad on top and you are good to go. Place a cute basket beside the change pad to store diaper essentials.
  • Shelf with hooks- so useful over the change table to hang up towels/clothing, for storage or as a display shelf.
    nursery storage baskets
    Keep fragile/important display items out of reach on high shelves.
  • Nursing chair- the size of the chair totally depends on how much space you have to work with. Our rooms are pretty tiny so we decided on a small modern rocking chair. Plus this chair can be used in other living spaces once it is no longer needed in the nursery.  Toss on a cute accent pillow/throw that matches the theme of the room!
    slim rocking chair
  • Ottoman- use for resting tired feet or as additional seating space. Floor poufs are especially adorable.
  • Standing wardrobe - useful if there is no closet in the room.
  • Rug- A small rug really ties the room together and makes it warm and cozy.  Throw in front of the crib or change table. Sheepskin rugs are really popular and make the room super cozy!
  • Accent/decor wall- match to theme of room.  You can get really creative here: decorative wallpaper, painted  stripes, decals...skies the limit!
    world wall decal
    World map decal for traveling theme nursery room!
  • Diaper pail- I personally love my ubbi. It isn't cheap but you save in the long run by being able to use your own bags. It also comes in different stylish colours so you can coordinate it with your room. I love that it is made of steel and keeps smelly odours sealed away.  Can be used for disposable or cloth diapers!
    ubbi
  • Black out blinds or curtains- necessary to help baby sleep better!
  • Ceiling mobile- to be hung over the crib or nursery chair. I have seen everything from traditional mobiles to lanterns and tissue balls.  Just match to the theme of your room.
  • Laundry hamper- home sense sells awesome hampers at a great price!
    laundry hamper basket
  • Extras- baskets, picture shelves (perfect for displaying favourite books as well!), frames, quilt, storage furniture, mirror, over the door organizer...
    over the door organizer
    Add extra storage easily with an over the door organizer!
    bookshelf
    expedit storage basket
    Storage baskets are great for hiding clutter and organizing toys.
  • Other important items- video monitor, humidifier, white noise machine, lamp.
Kiori's room is very feminine and airy with gray and light pink hues. Her name was spelled out with painted wooden letters and framed with butterfly decals. This made up the accent wall. A mobile with paper butterflies was hung from the ceiling.
girls bedroom decor
The crib was swapped for a bed to create a sweet toddler room:)
shelf

Kian's room is clean and modern with a travelling/exploration theme in gray, orange and blue. A world map decal in a lighter shade of gray was used to create the accent wall. A solar system mobile, wooden airplane and world globe complete the look.
solar system mobile
wooden airplane


Tip! Gray provides a clean and modern background for any room. It's also gender neutral and goes well with any colour. 

Tip! Create a nursery room that you can easily transition into a kids room. This can be accomplished by avoiding "babyish" themes/decor (ie. baby disney characters). Picture a bed in the room in place of the crib. That's all you should really have to swap when it's time for the big change.

To help you design the perfect nursery for your little one, we've created a checklist with the items listed above!

How did you design your nursery?  What elements did you include, and what was your theme?

Friday, 10 April 2015

The one thing I wish I knew before I had a baby....

breastfeeding

...that breastfeeding wasn't all that easy. All the images we see of women breast feeding portray happy mamas smiling down at their angelic suckling babies. Not this mama. For the first month of breastfeeding my first born, I suffered. Breastfeeding hurt. A lot. Cracked, bleeding nipples are never fun. Throw in a starving needy newborn into the mix and you have the perfect recipe for a full-blown meltdown. The anticipation of my baby waking up and wanting to nurse was gruelling. I would curl my toes and clench my jaw while nursing in reaction to the pain. I eagerly participated in a breastfeeding class and received one-on-one support from a certified lactation consultant. I was told that if my baby latched on correctly, I shouldn't feel pain. Well, my baby had a perfect latch and was gaining weight beautifully but I was STILL in a heck of a lot of pain. Creams only helped so much. So how did I survive four long weeks of torture? With support from another mother who endured the same breastfeeding fate. My sister reminded me that there was a bright light at the end of the very dark tunnel. That one day I would wake up and nursing would be pain-free. She was right. One day I did wake up and breastfeeding suddenly became magical...the pain had dissipated. Was the month of pain worth it? Yes, absolutely. For me it was. I'm giving my baby nature's perfect liquid. I never have to worry about heating up bottles, sanitizing nipples or stocking up on formula. So this message goes out to all the expectant mothers who have the desire to breastfeed....you have the support of many mamas around you. The start may not be easy (fingers crossed you will be one of the lucky ones with no issues) and there will be days where you feel like you've hit rock bottom, but please don't give up. I promise you it gets better. You can do it.

Breastfeeding survival tips!
  • Stress totally affects milk production. Relax as much as possible. Take baby to bed with you and have someone at home to bring you meals/snacks/drinks.
  • Use a pump to get your milk flowing before your baby latches on. They won't have to suck as aggressively which is easier on sore nipples.  Out of all the pumps I have trialed (and I am a self proclaimed pump expert) I LOVE the Medela Harmony Manual pump for occasional pumping.  No fussing with tubes, super portable and powerful!
  • The Booby Trapper is one awesome breastfeeding cover. It has a double plastic ring so you can easily view your baby and ensure optimal positioning during nursing. Also doubles as a sun/wind cover and keeps baby from getting distracted while nursing.  
Booby trapper

breastfeeding cover
Hee Hee, That's actually my little one's hand peeping out....
  • Massage breasts while taking a hot shower to help soothe engorged breasts.
  • Bamboo nursing pads are much gentler than disposable pads. I found the disposable kind would stick to my already sensitive nipples.  I liked Applecheeks and Bamboobies pads.
How did breastfeeding go for you? Share your breastfeeding adventures and tips below!  We'd love to hear your stories!

Wednesday, 8 April 2015

Naturally Dyed Playdough

playdoh
With a lot time spent indoors this winter, my survival was based on finding fun activities to occupy my busy toddler. Thank goodness for playdough. She can play with it for hours on end. After a lot of trial and error and testing out various recipes, I found an all-natural, super-easy recipe (no cooking required!). Way cheaper than the store bought kind and fun for kids to help make.
playdoh ingredients

Ingredients:
  • 2 cups flour
  • 1/2 cup salt
  • 1/4 cup cream of tartar
  • 1.5 - 2 cups boiling water
  • 2 tbsp oil
  • natural dyes (check out our egg dye post for ideas!)
  • optional: to make scented playdough add in concentrated juice or few drops of essential oil (like lemon, orange, or lavender)
  • optional: to make glittery playdough add in a few tbsp of glitter
Method:
  1. Mix flour and cream of tartar together in a large bowl.  If adding glitter, mix it in at this point.
  2. Put salt into boiling water and mix to dissolve.  Mix in dye here if desired, or use water from boiling your natural dye ingredients.
  3. Pour boiling water mixture into dry ingredients and mix together slightly using a wooden spoon or spatula.
    dyeing playdoh

    natural playdoh
  4. Add in the oil and incorporate further.
    playdoh recipe

    natural playdoh

  5. Once the mixture is coming together, knead it using your hands.
    knead playdoh
  6. Store in Ziploc bag. Lasts a long time (up to 6 months) if stored properly after playing.
Tip! What kid doesn't love playdough? Perfect for giveaways at parties. You can match the colour to the party theme. Add a cookie cutter for extra cuteness!


natural playdoh beets
What's your favourite playdough recipe? Please share, or let us know how your playdough turned out!

natural playdough

Saturday, 4 April 2015

Egg-ceptional Educational Easter Egg Hunt

Easter egg hunts don't have to be all about stuffing your kids face with chocolate! Not in this household at least. Why not use plastic egg and label each with a letter from the alphabet? Your child will love hunting for eggs and learning the alphabet all at the same time. Take it one step further by filling the egg with an item that begins with that letter. Ask your child to run around the house and find the hidden alphabet eggs. Make sure they identify the letter before placing it in the basket. Then have fun opening up each egg!

Tip! Before your child opens up the egg have them guess what items could be inside that start with the letter labelled on the egg.

Materials:
  • 26 plastic eggs
  • Alphabet stickers or permanent marker
  • Items for eggs (suggested list below but you can fill with anything you want/have lying around the house.  If you prefer to keep things simple, use stickers i.e. sticker of a lion for the letter "L")
Egg Filler Ideas:
A- Apricot
B- Blueberries
C- Cookie
D- Doll
E- Egg
F- Feather
G- Goldfish
H- Hair clip
I- Ice cream (sticker/picture of one)
J- Jelly beans
K- Keychain
L- Lollipop
M- Money
N- Notepad
O- Oreo
P- Play dough
Q- Quarter
R- Raisins
S- Socks
T- Train
U- Umbrella (sticker/picture of one or the mini cocktail ones)
V- Violin (picture of one)
W- Watch
X- Xylophone (sticker/picture of one)
Y- Yarn
Z- Zipper

Hoppy egg hunting!  :)
Related Posts Plugin for WordPress, Blogger...