Showing posts with label craft. Show all posts

Thursday, 2 June 2016

Easy & Fun Sock Donut Craft

In the words of Homer Simpson, "Mmm...donuts!"  They're so tasty and have gone so gourmet lately!  When I saw these sock donuts at my local drop-in program, I knew I had to try making them at home.  Cue today, when my younger son took an amazingly long nap, so my daughter and I had some crafty bonding time.


All you need are socks, and whatever decorations you want to put on top!  It was so fun to decorate these sock donuts and it was so good for my daughter's fine motor skills.  She cut, glued, rolled and assembled her own donuts and it kept us busy for well over an hour!


Materials:
  • socks
  • scissors
  • glue (we used white glue and hot glue)
  • decorations - felt, pipe cleaners, beads, string, fun foam, etc.
 
Method:
  1. Take a sock and cut the toe open, so the sock forms a tube.
  2. Roll the sock on itself until you get a donut shape.  Adhere the ends with a little glue so it doesn't unroll.


  3. Cut out and glue different decorations on top.  Be careful to use strong glue if you have a little one and choose to decorate with beads!

  4. Let them dry!  You can use them as food items in your play kitchen, or sing this donut song with them!  You can also use them for the Five Little Monkeys song, replacing "monkeys" with donuts.
We hope you have lots of fun making and decorating these sock donuts and playing with them! Ours make me want to get a cronut!


Thursday, 5 May 2016

Mother's Day Cherry Blossom Craft

Time is running out! Mother's day is coming up quick...real quick (panic is setting in)! If you are looking for an easy craft for your kid to make for the special women in their lives (grandma?), this craft is it. Costs under $10 for the materials and takes about half an hour to throw together including clean-up time. The cherry blossom tree in our backyard was the inspiration behind this craft. Cherry blossoms are breathtakingly beautiful and your little one can recreate this beauty on canvas using their fingerprints. Okay, hurry up! Grab the materials, your kid and get started!

Materials (all purchased from Dollarama...obviously)
  1. Large canvas
  2. Non toxic paint (we used brown, antique white, pink, blue)
  3. Permanent marker
  4. Paint brush or sponge brush
  5. Paper plate (or paint palette)

Instructions
  1. Using the brown paint, paint cherry blossom tree branches as shown.  Depending on your child's artistic level, you could get them to do this part of the craft. 

  2. Using pink and white paint, have your child make "cherry blossoms" on the branches using their fingerprints. 
  3. Coat your child's foot with paint (we used blue paint) to make a "bird" footprint on a branch. The heel of the foot is the bird's head, and the toes are the bird's tail feathers. I suggest you throw your kid in the bath at this point to wash off the paint.


  4. Once dry, decorate the bird (add an eye, beak, feet etc.) using a black sharpie. You can also use a different colour of paint to add a belly, feathers etc.
  5. Don't forget to have your little Picasso sign their artwork!
Oh and don't forget about our coffee filter crafts if you are looking for another easy Mother's Day craft idea. 

Happy Mother's Day to all the amazing mamas out there:) xo


Sunday, 13 March 2016

Easter Bunny Butt Decor

I have a confession. I am obsessed with bunny butts. Those adorable fluffy cotton balls melt my heart into a puddle of mush. There is nothing like Peter Rabbit's behind...well except for David Beckham's tushie but that's a whole other blog post. The next 3 posts leading up to Easter are dedicated to bunny butts. If you are thinking about hosting a kid's Easter party, bunny butt decor is so easy and cute to whip together.  Here are some ideas to get you started.

Bunny Butt Napkin Rings


Materials 

  • toilet paper rolls
  • felt (your choice of colour)
  • foam sheets (I happened to find foam bunny rabbit shapes at dollarama!)
  • pom poms
  • round make-up sponges 
  • glue (you can use regular glue but I prefer a hot glue gun since I can be very inpatient)
  • scissors
  • tape


Instructions

  1. Cut toilet paper roll in half
  2. Cut felt into a wide strip to cover paper roll. Tape or glue into place.
  3. Glue foam bunny ears to back of make-up sponge and glue pom pom onto the front. Glue completed bunny onto the napkin ring (be sure to cover the felt seam).
  4. Insert napkins and wow your little guests!

yes, that's face paint on my daughter again.

Bunny Butt Place Cards
Glue completed bunny onto a place card (you can make your own by folding rectangular pieces of card stock or stiff paper in half or you can buy a bunch at the dollar store and save yourself the hassle).

Bunny Butt Straws
Glue completed bunny onto a paper straw. You can glue another round make-up sponge or a piece of circular paper as a backing.

Bunny Butt Cups
Cut out foam bunny ears and glue onto cup. Glue on pom pom.

I can't handle the cuteness. I'm pretty sure I was wayyyy more excited than my daughter to drink through a bunny butt straw. Do you have a similar obsession? Please share with us (tag us on instagram @smocksandsprinkles) and get started on your bunny butt decor! Hoppy crafting:)

Saturday, 5 March 2016

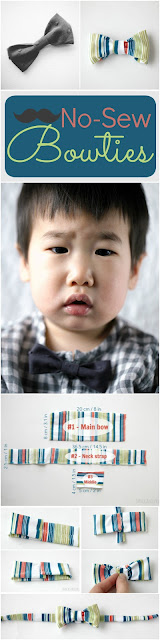
DIY Bowties for your Little Guy

DIY bowtie

Little boys in bowties are the bomb diggity.  Seriously, can you resist them when they look like this?!

little boy's bowtie

Bowties are actually deceptively simple to make!  You can use hot glue to hold it together if you're not going to use it much, or sew it for longevity.  Pair it with some suspenders, a cute button up shirt, and maybe some horn-rimmed glasses?  Save this tutorial for your hipster teenager's prom, too!  You can wear the bowtie by attaching straps, safety-pinning, buttoning etc.  Pssst...if you attach it to a headband base (check out our headband tutorial for measurements in step 13), you can double it as a cute bow hairband, or put it on a clip as a cute hairbow!

bow tutorial

Materials:
  • fabric of your choice
  • hot glue gun & sticks or sewing needle with matching thread 
  • velcro, clip, button or safety pin

Tip!  Use a lightweight cotton material for a crisp, clean look (like my gray bowtie) and easy assembly.  The striped bowtie is made of stretch jersey and was thick and more slouchy looking.  It was also harder to work with when assembling.

Method:
  1. Cut your fabric into 3 pieces as indicated in the image (these measurements are for a toddler bowtie - see the end for the man-size measurements).
    bowtie tutorial
  2. Take the rectangle #1.  This will form the main bow.  Fold one side into the middle.
    bowtie tutorial
  3. Put a small line of glue at the top and bottom.  Fold the other side in and press into the glue.  You'll notice that the middle is left open.
    bowtie tutorial
  4. Put one dot of glue in the centre and adhere the fabric.
    DIY bowtie
  5. Fold both ends into the centre and put dots of glue to adhere them, overlapping them by about 1/4".  This becomes the main bow part.  Set this aside while you work with the other fabric pieces.
    boy's bowtie
  6. Take the smallest rectangle (#3).  Run a line of glue on the right side (the front, nice side) of the fabric.
    bowtie tutorial
  7. Fold the fabric in half on top of the glue.  Wait a few seconds for the glue to dry.
    bowtie tutorial
  8. Flip this fabric tube inside out.  This will be the middle of your bow.
    bowtie tutorial
  9. Take this piece and wrap it around the middle of your larger bow piece and glue it, scrunching the bow piece.  Hide the raw edges of the bow inside this middle piece.
  10. Optional: I "unrolled" part of the striped bow to make it a little fluffier.  I left the gray one as is.  You can play around with it.
    DIY bowtie

    bowtie tutorial
  11. When you're happy with the creases and bunching in your bow, use hot glue to preserve all the folds.
  12. You can hot glue this bow to a clip, or you can do what I did and attach a safety pin because I'm lazy and didn't want to add any more steps!  I just slipped the pin underneath the center piece and glued it.
    DIY bowtie
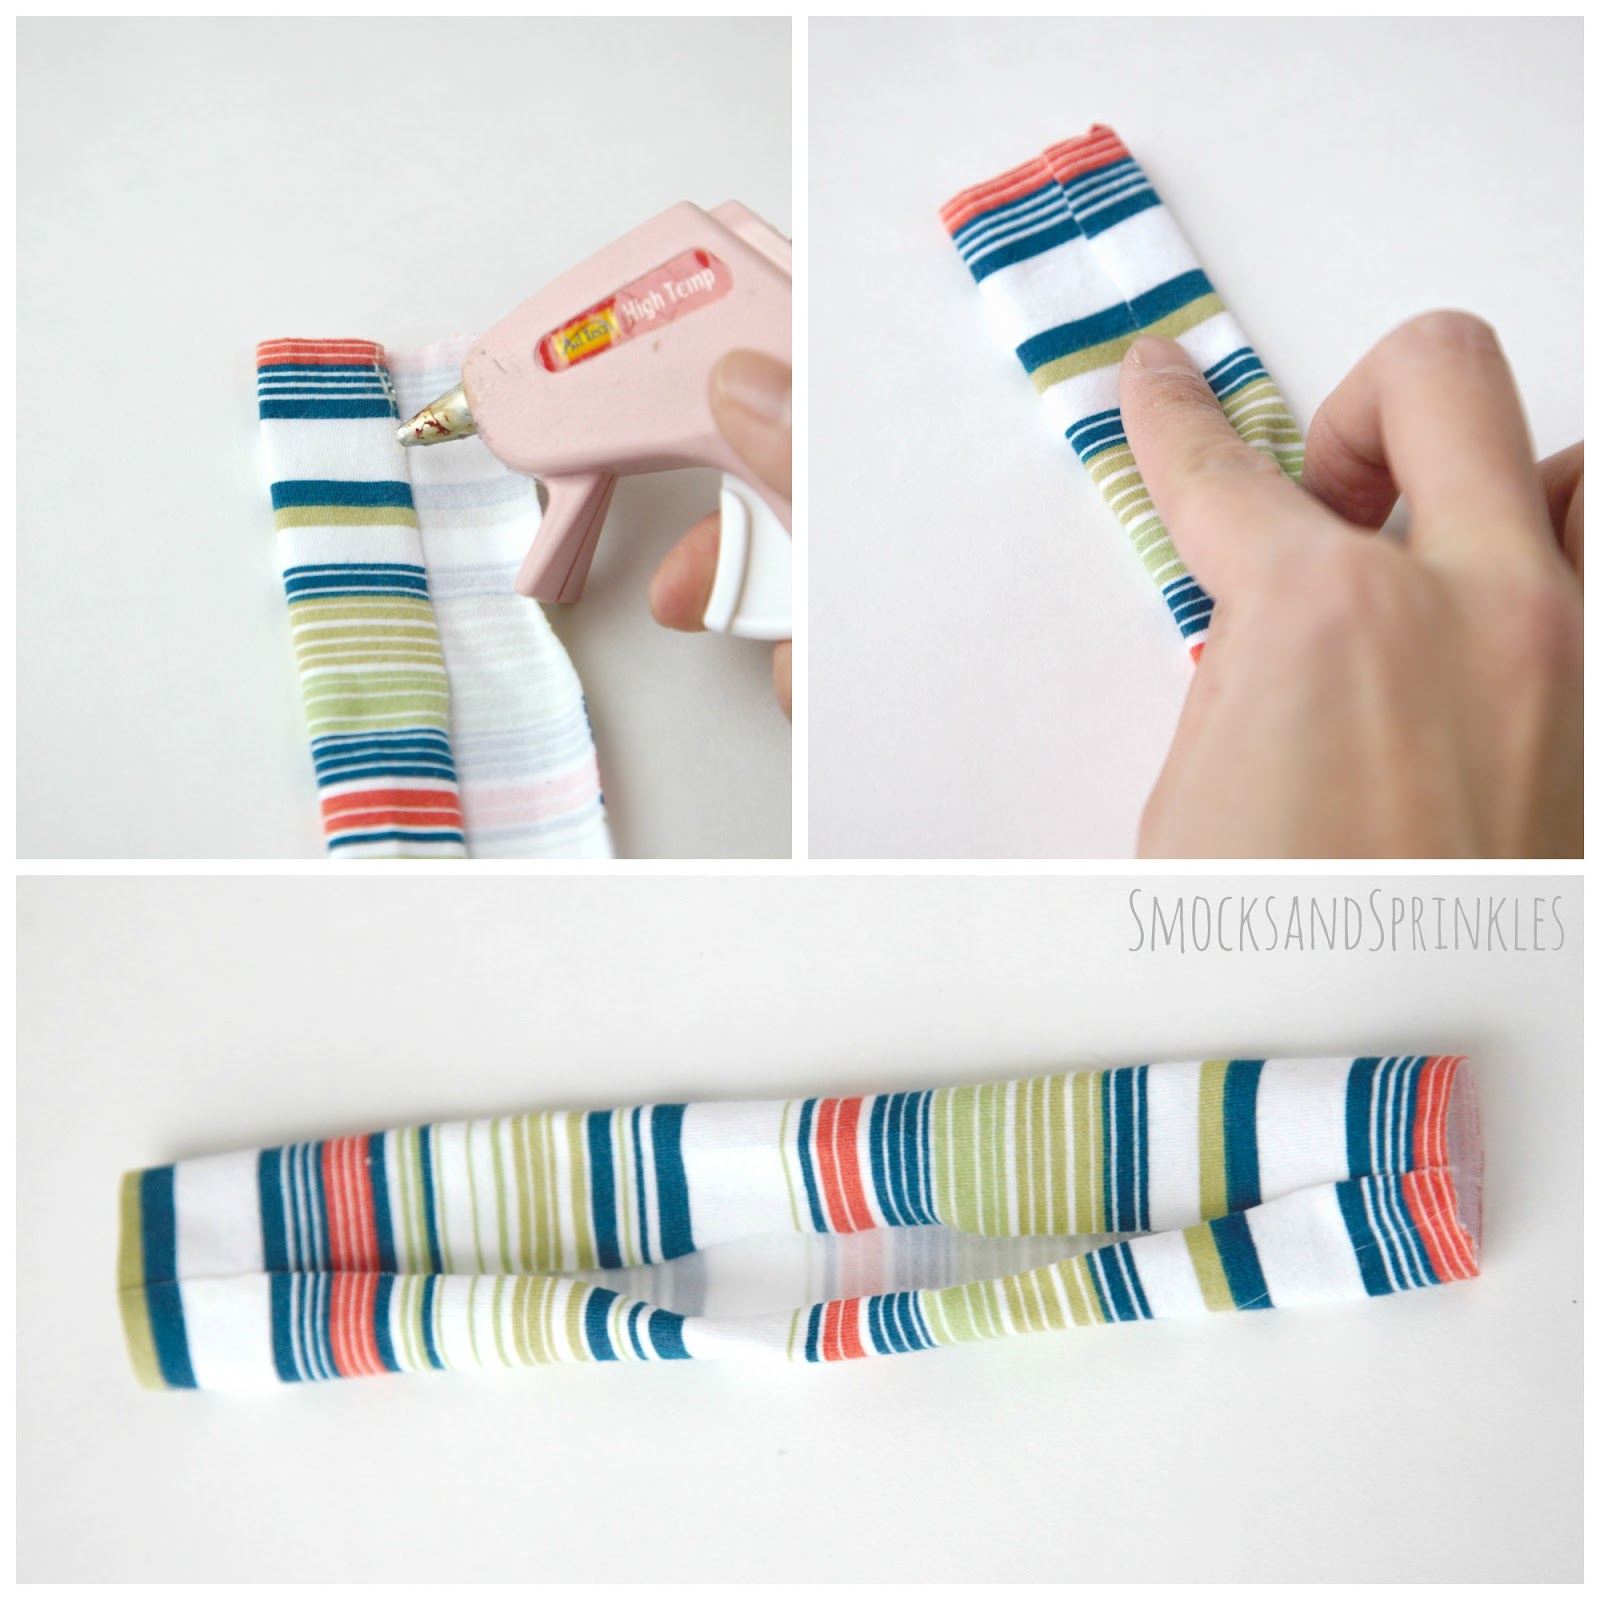
  13. You could also attach it to a strap.  To make the strap, I took the long, skinny fabric piece (#2) and folded in one side.  Applying hot glue in small sections, I folded the other side on top until I had a tube.
    Boy's bowtie
  14. Adhere the bow to the center of the strip using some more hot glue, or string the strip through the middle bow piece.
    boy's bowtie
  15. Attach either a button or velcro (I recommend sewing buttons and velcro) to the ends of the strip so you can close it around your toddler's neck.  If the size isn't quite right, cut the strip to the right size.  If this step is too difficult, you can always tie it at the back, but you'll need to make it slightly longer.
    DIY bowtie
You can also sew a button directly to the bow, so that you can button it straight on a shirt.  Voila, you have the most dapper gentleman you've ever seen!

DIY Bowtie

One of our readers requested measurements for a man-sized bowtie, and I thought it was a great idea so I crafted a large-size one.  She said she wanted to make matching bowties for all the men in her life!  Can you imagine how cute that would be?!  The measurement for the man-size large bow piece is 11" x 4" (21.5cm x 10cm).  The small center piece is 1.6" x 2" (4 cm x 5 cm).  Follow the same directions!  And I say just safety pin it on the big boy.  He can handle himself around pins.  Hopefully?

Be sure to tag us on Instagram (@smocksandsprinkles) so we can see all the cute gentlemen in your life, sporting these easy bowties!
bowtie tutorial
Pin me for later!
Related Posts Plugin for WordPress, Blogger...