Little boys in bowties are the bomb diggity. Seriously, can you resist them when they look like this?!
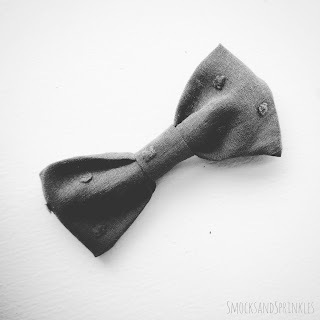
Bowties are actually deceptively simple to make! You can use hot glue to hold it together if you're not going to use it much, or sew it for longevity. Pair it with some suspenders, a cute button up shirt, and maybe some horn-rimmed glasses? Save this tutorial for your hipster teenager's prom, too! You can wear the bowtie by attaching straps, safety-pinning, buttoning etc. Pssst...if you attach it to a headband base (check out our headband tutorial for measurements in step 13), you can double it as a cute bow hairband, or put it on a clip as a cute hairbow!
Materials:
- fabric of your choice
- hot glue gun & sticks or sewing needle with matching thread
- velcro, clip, button or safety pin
Tip! Use a lightweight cotton material for a crisp, clean look (like my gray bowtie) and easy assembly. The striped bowtie is made of stretch jersey and was thick and more slouchy looking. It was also harder to work with when assembling.
Method:
- Cut your fabric into 3 pieces as indicated in the image (these measurements are for a toddler bowtie - see the end for the man-size measurements).
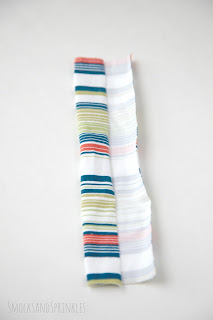
- Take the rectangle #1. This will form the main bow. Fold one side into the middle.
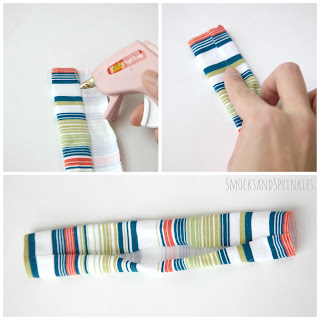
- Put a small line of glue at the top and bottom. Fold the other side in and press into the glue. You'll notice that the middle is left open.
- Put one dot of glue in the centre and adhere the fabric.
- Fold both ends into the centre and put dots of glue to adhere them, overlapping them by about 1/4". This becomes the main bow part. Set this aside while you work with the other fabric pieces.
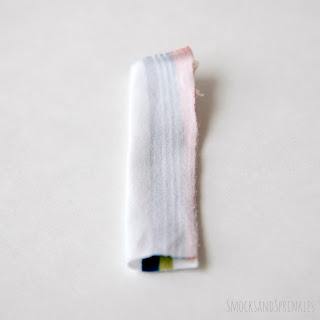
- Take the smallest rectangle (#3). Run a line of glue on the right side (the front, nice side) of the fabric.
- Fold the fabric in half on top of the glue. Wait a few seconds for the glue to dry.
- Flip this fabric tube inside out. This will be the middle of your bow.
- Take this piece and wrap it around the middle of your larger bow piece and glue it, scrunching the bow piece. Hide the raw edges of the bow inside this middle piece.
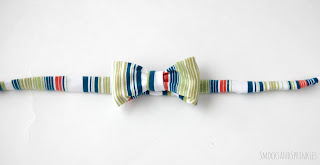
- Optional: I "unrolled" part of the striped bow to make it a little fluffier. I left the gray one as is. You can play around with it.
- When you're happy with the creases and bunching in your bow, use hot glue to preserve all the folds.
- You can hot glue this bow to a clip, or you can do what I did and attach a safety pin because I'm lazy and didn't want to add any more steps! I just slipped the pin underneath the center piece and glued it.
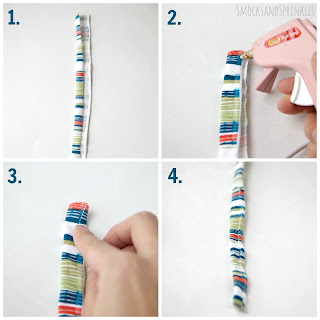
- You could also attach it to a strap. To make the strap, I took the long, skinny fabric piece (#2) and folded in one side. Applying hot glue in small sections, I folded the other side on top until I had a tube.
- Adhere the bow to the center of the strip using some more hot glue, or string the strip through the middle bow piece.
- Attach either a button or velcro (I recommend sewing buttons and velcro) to the ends of the strip so you can close it around your toddler's neck. If the size isn't quite right, cut the strip to the right size. If this step is too difficult, you can always tie it at the back, but you'll need to make it slightly longer.
One of our readers requested measurements for a man-sized bowtie, and I thought it was a great idea so I crafted a large-size one. She said she wanted to make matching bowties for all the men in her life! Can you imagine how cute that would be?! The measurement for the man-size large bow piece is 11" x 4" (21.5cm x 10cm). The small center piece is 1.6" x 2" (4 cm x 5 cm). Follow the same directions! And I say just safety pin it on the big boy. He can handle himself around pins. Hopefully?
Be sure to tag us on Instagram (@smocksandsprinkles) so we can see all the cute gentlemen in your life, sporting these easy bowties!
 |
| Pin me for later! |









No comments:
Post a Comment